
Gordons Projects Arduino GPS Tracker
1. Connect the antenna to the GPS unit. 2. Solder header pins as needed to the GPS module. 3. Connect the USB-TTL cable to your computer. 4. Connect the power and ground from the cable to the power and ground of your USB module. 5. Connect the TTL Rx cable to the GPS Tx and the TTL Tx to the GPS Rx.
How to use GPS with Arduino Parse and Log NMEA Sentences Tutorial
Place a jumper cable between digital i/o pin 2 and ground (as Shown Below). This switches the GPS Unit on and you can use the Arduino's serial port to read the data. The GPS unit can be attached to the Arduino and the USB connected. Select the Arduino's Serial Port and adjust the speed to 4800 Baud.
Arduino GPS Oled 4 Steps (with Pictures) Instructables
Step 1: Start with the GND connections Step 2: Connect the UART Tx pin Step 3: Connect the UART Rx pin. Step 4: Connect the Power pin. Step 5: The Complete Connection Arduino Code Example For The Neo-6M GPS Module The complete Arduino code for the Neo-6M GPS Module FAQs About The GPS Module Neo-6M And Arduino Projects 1.
Arduino GPS real time clock with NEO6M module Simple Circuit
The module communicates with the Arduino via serial communication using the TX and RX pins, so the wiring couldn't be simpler: Getting GPS Raw Data To get raw GPS data you just need to start a serial communication with the GPS module using Software Serial. Continue reading to see how to do that. Parts Required
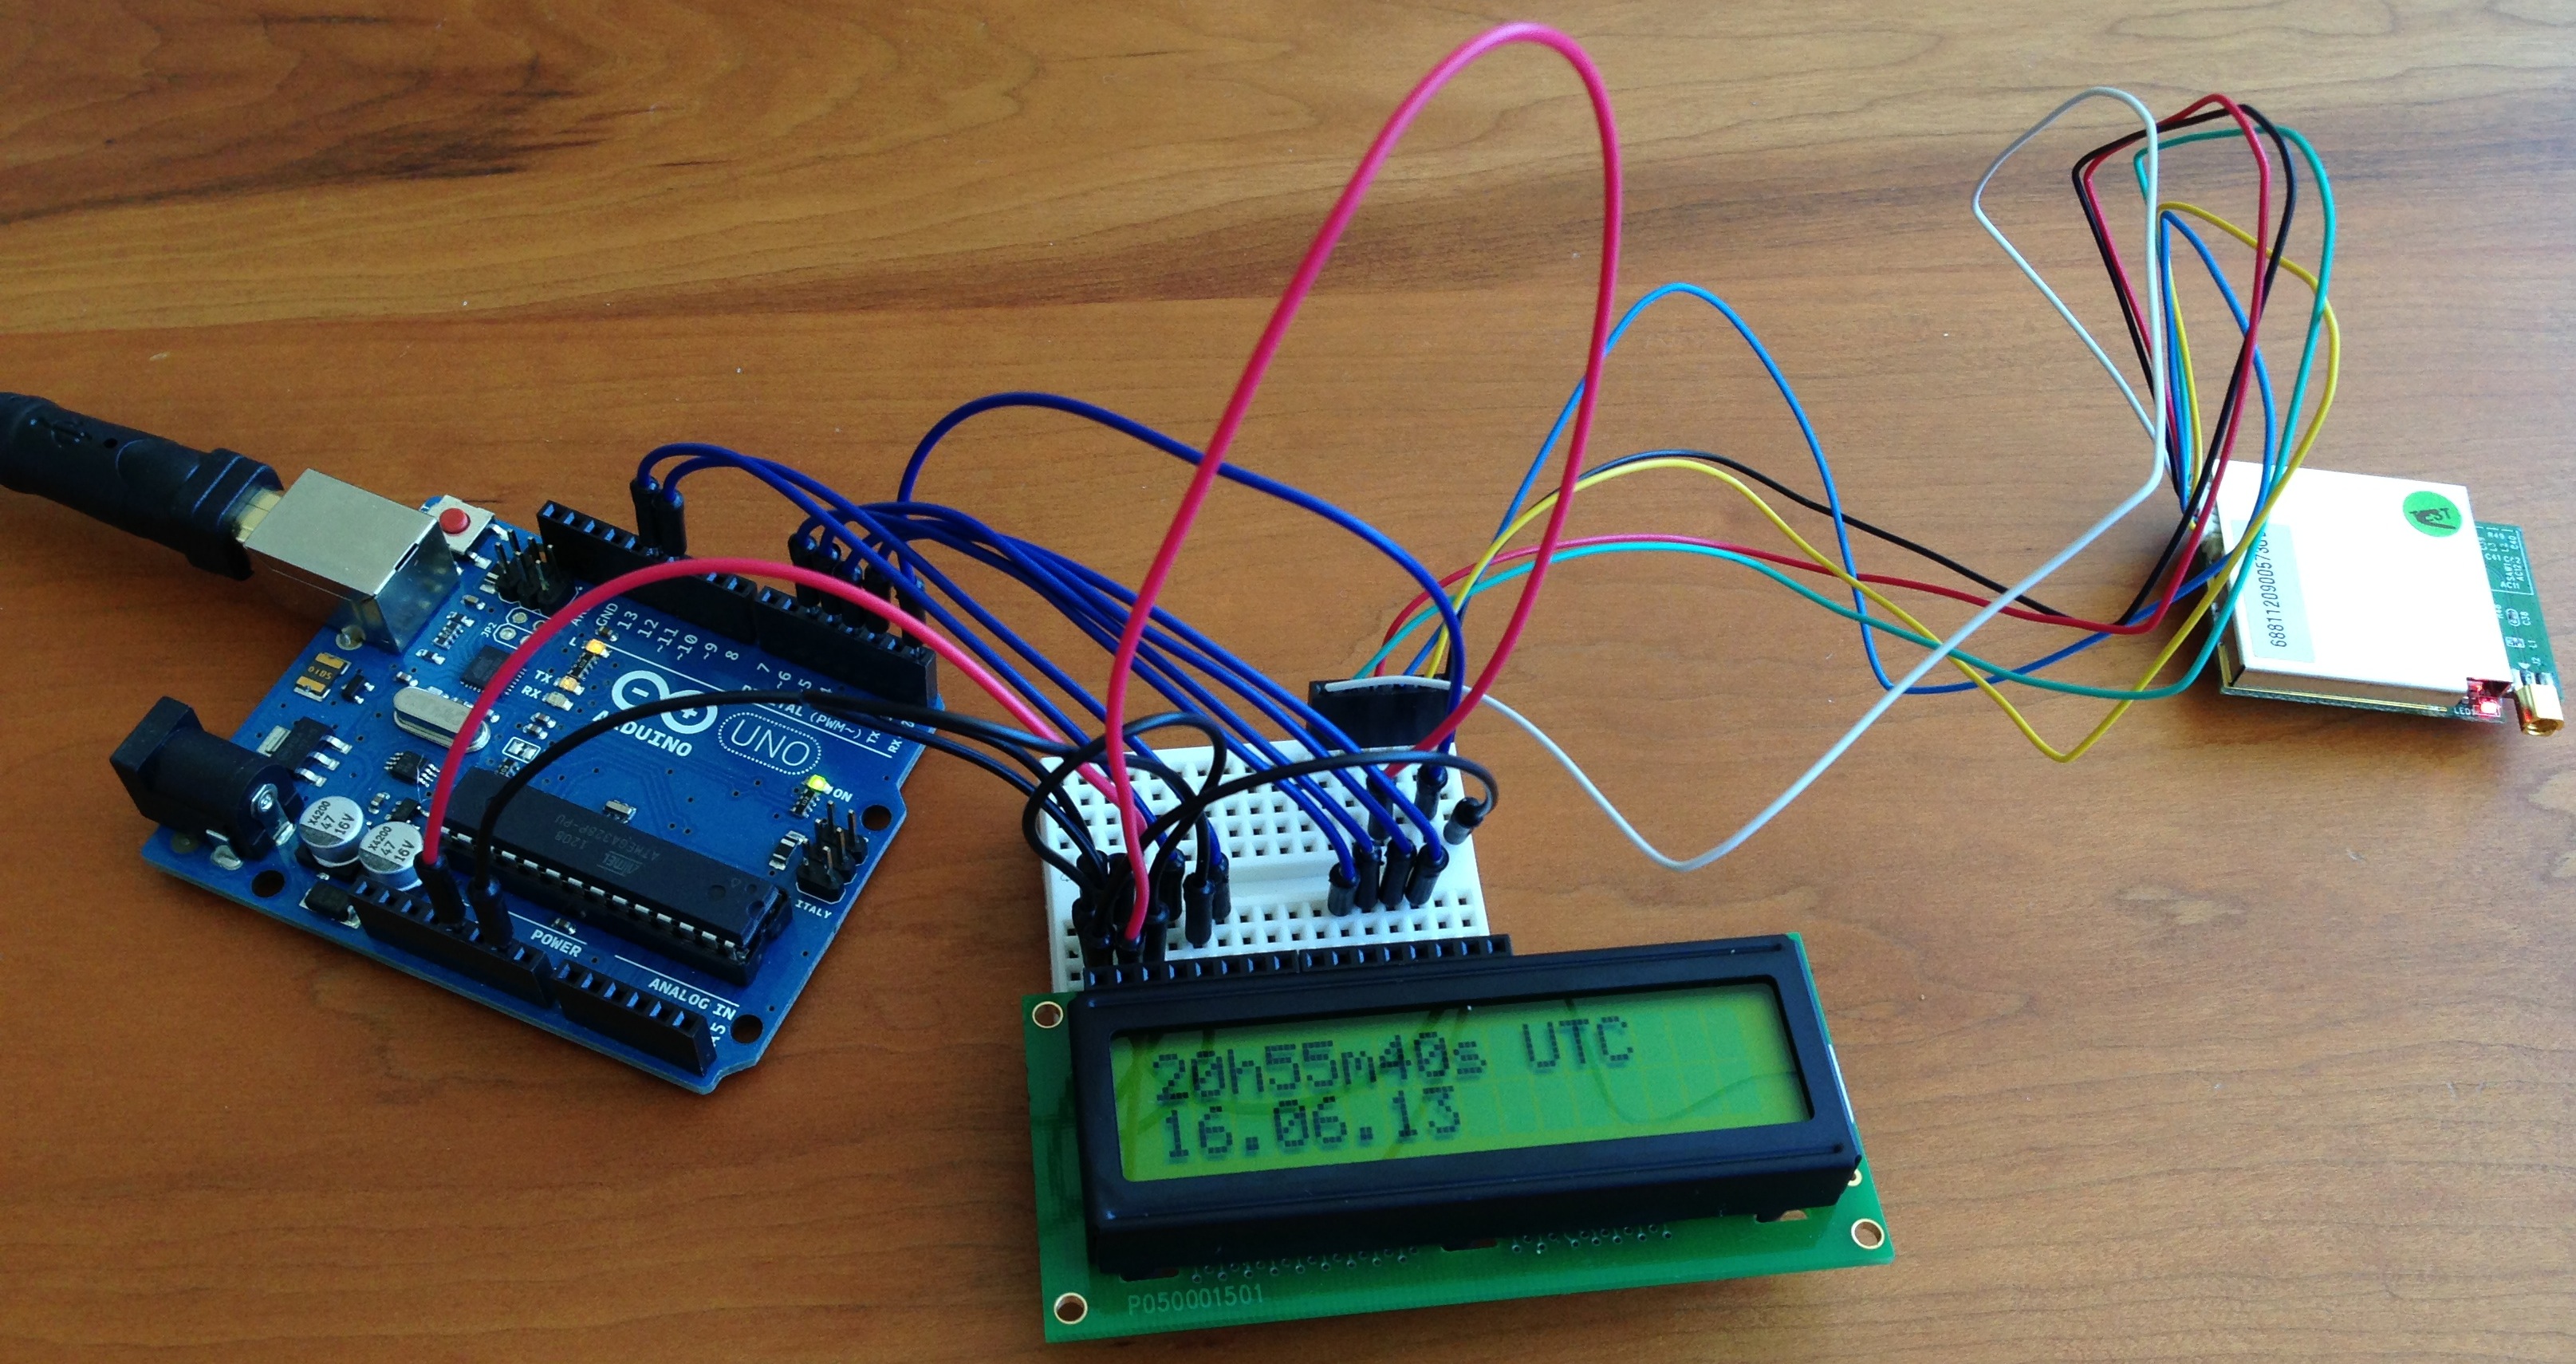
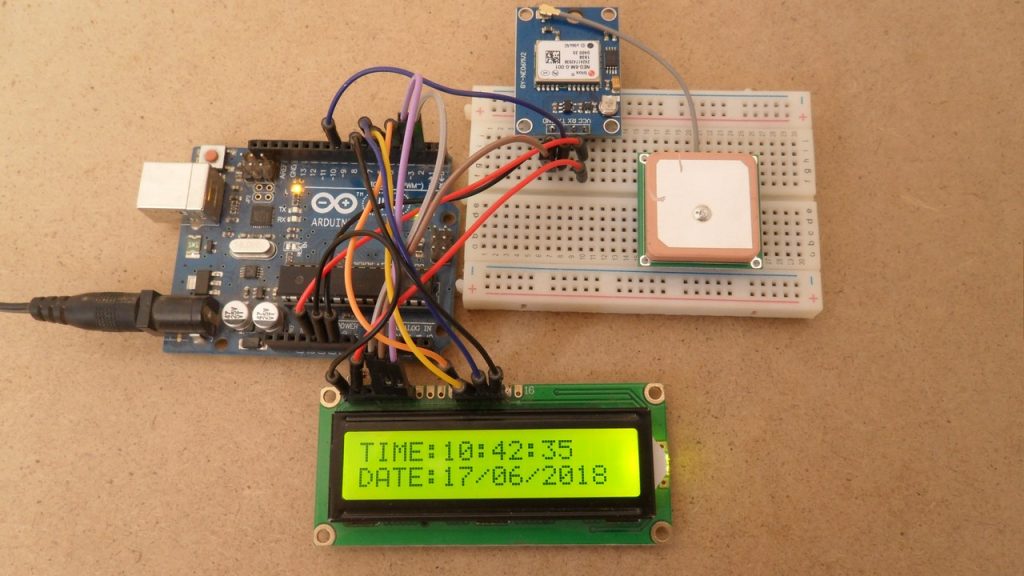
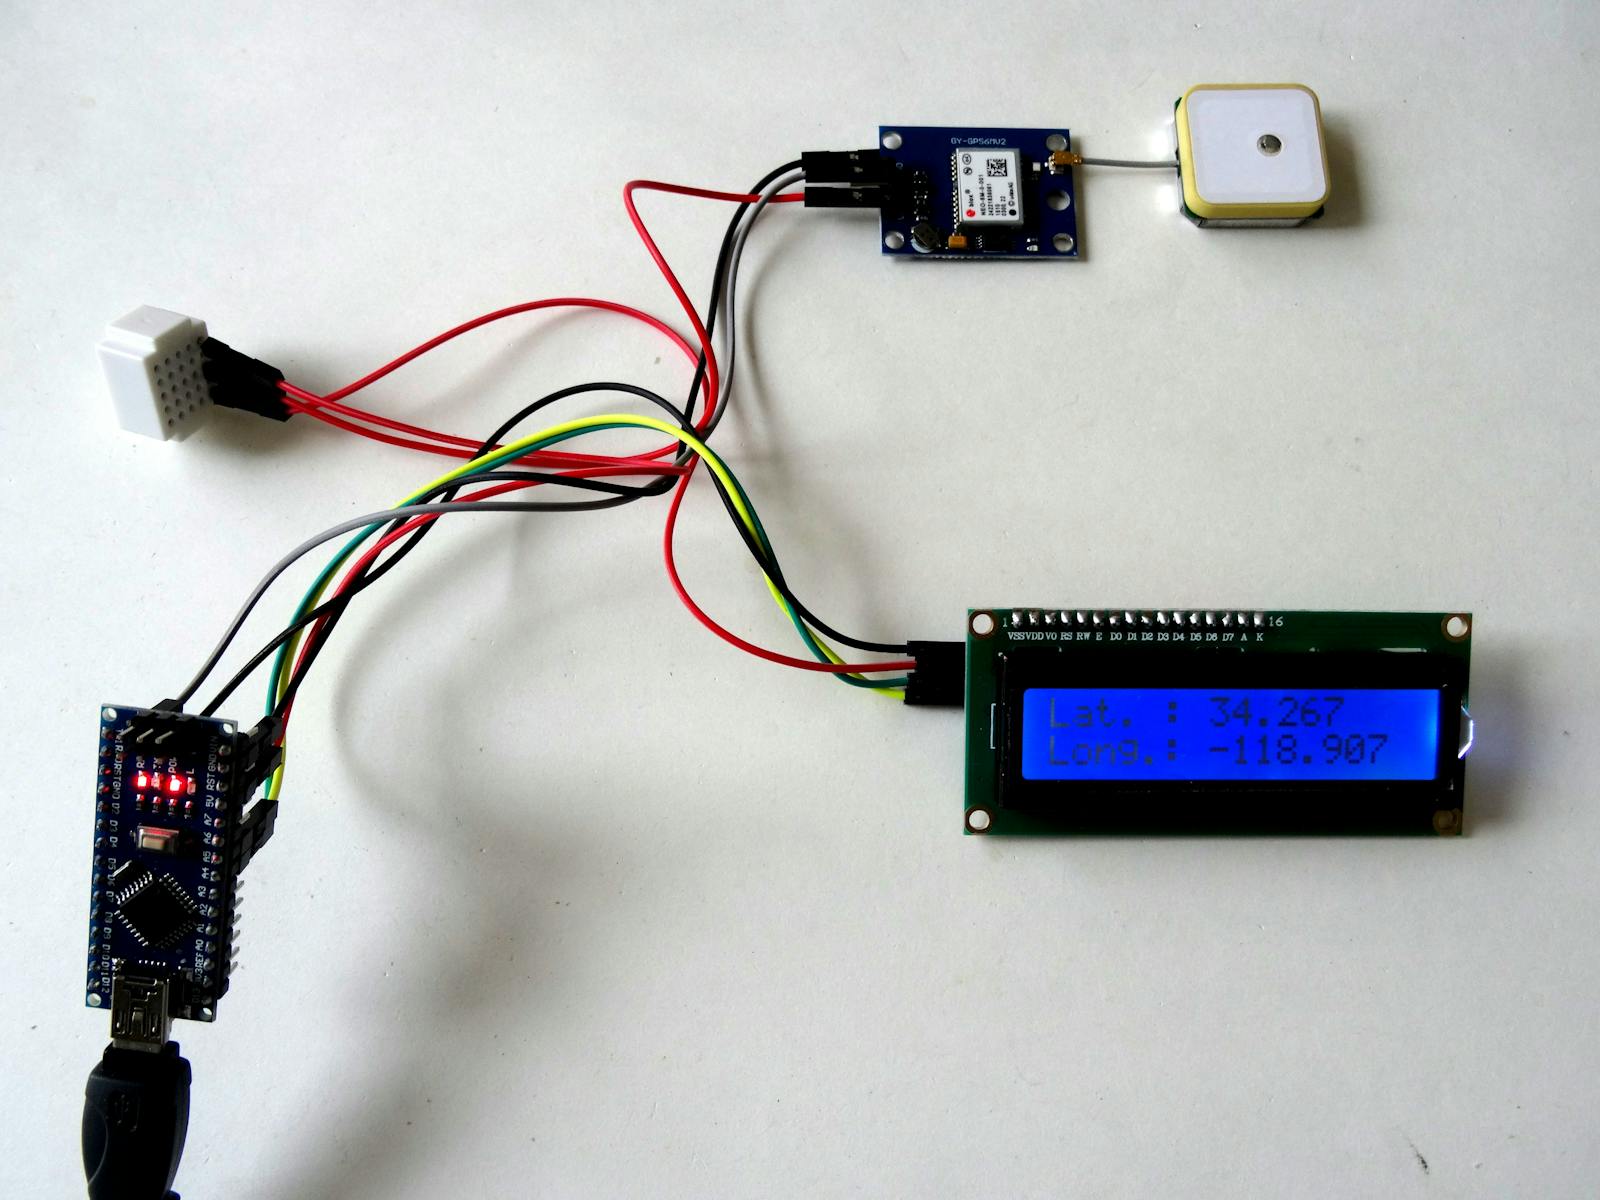
Arduino showing information from a GPS on a LCD
News Arduino GPS Modules - Which one to use? Comparison, Arduino Tutorial, and projects By Shawn 4 years ago Introduction to GPS and GPS Modules Satellites that transmit data to your GPS modules You're probably familiar with GPS as the ones that give you directional information through your phone, car, or on your preferred maps app.
Arduino GPS Tutorial How to Use a GPS Module with Arduino
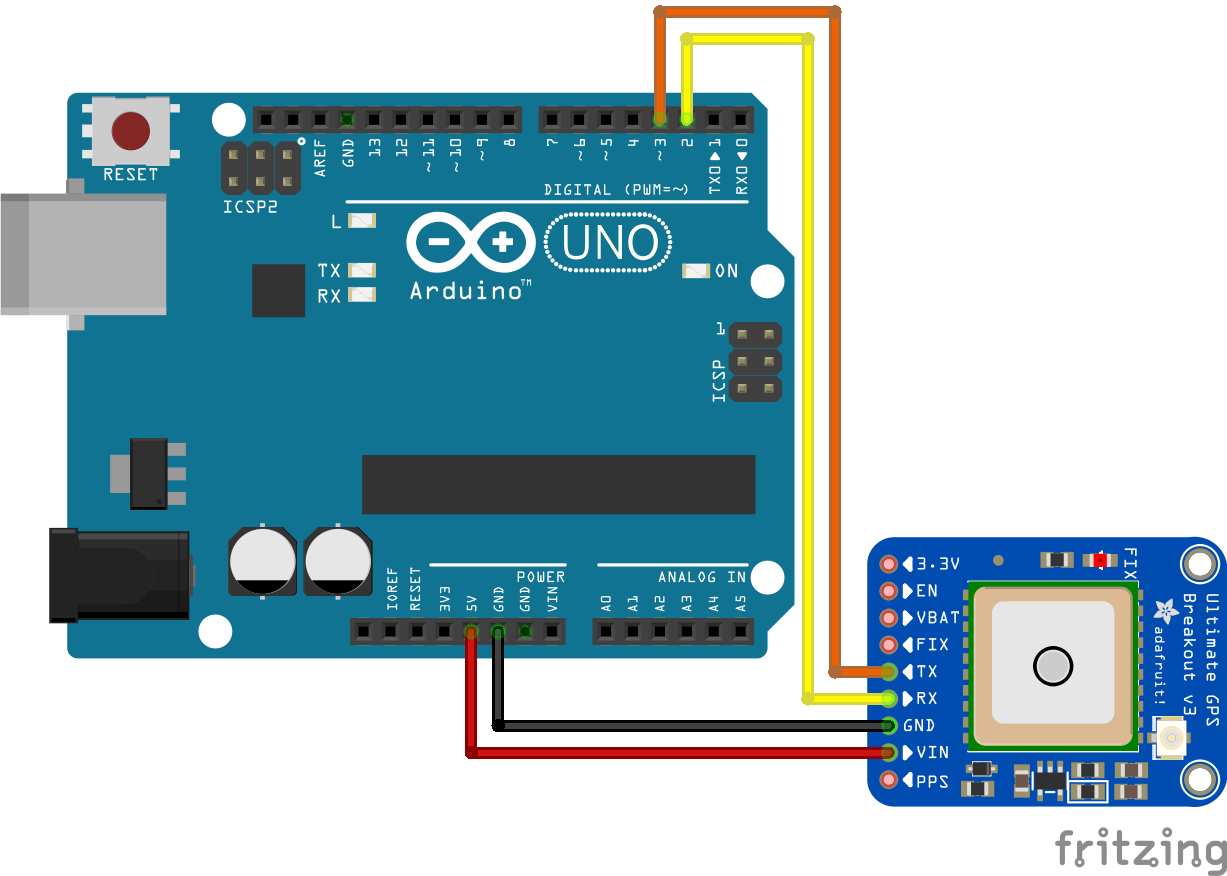
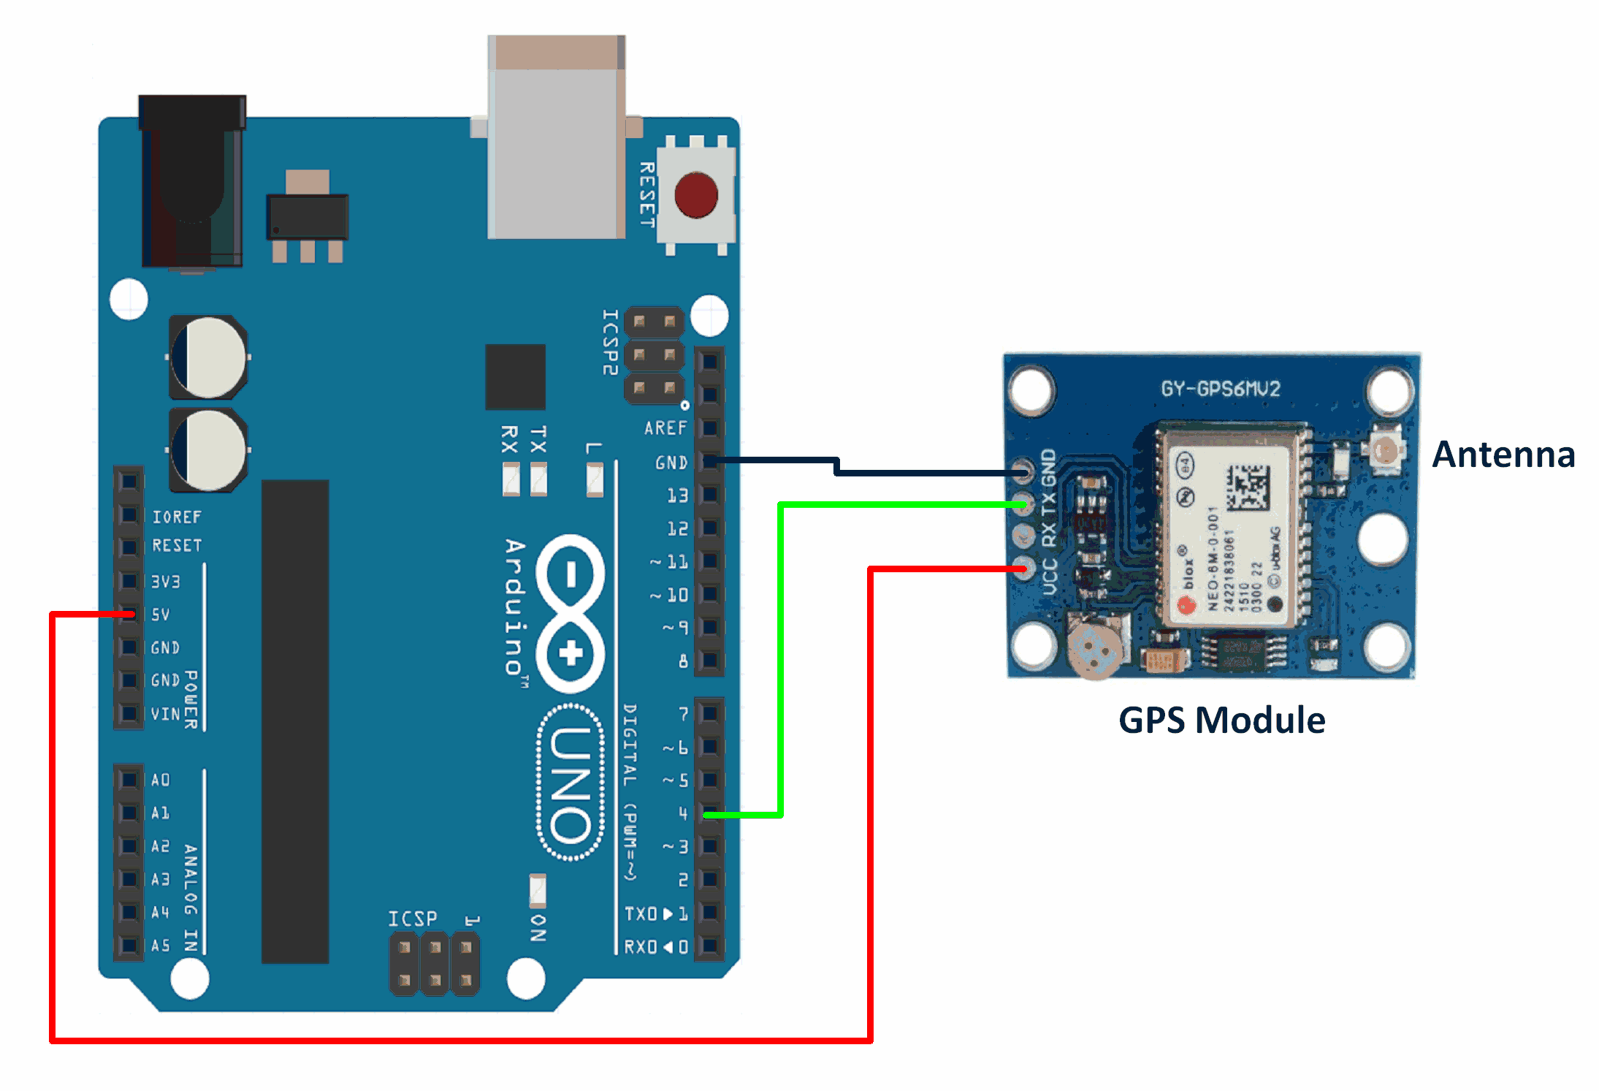
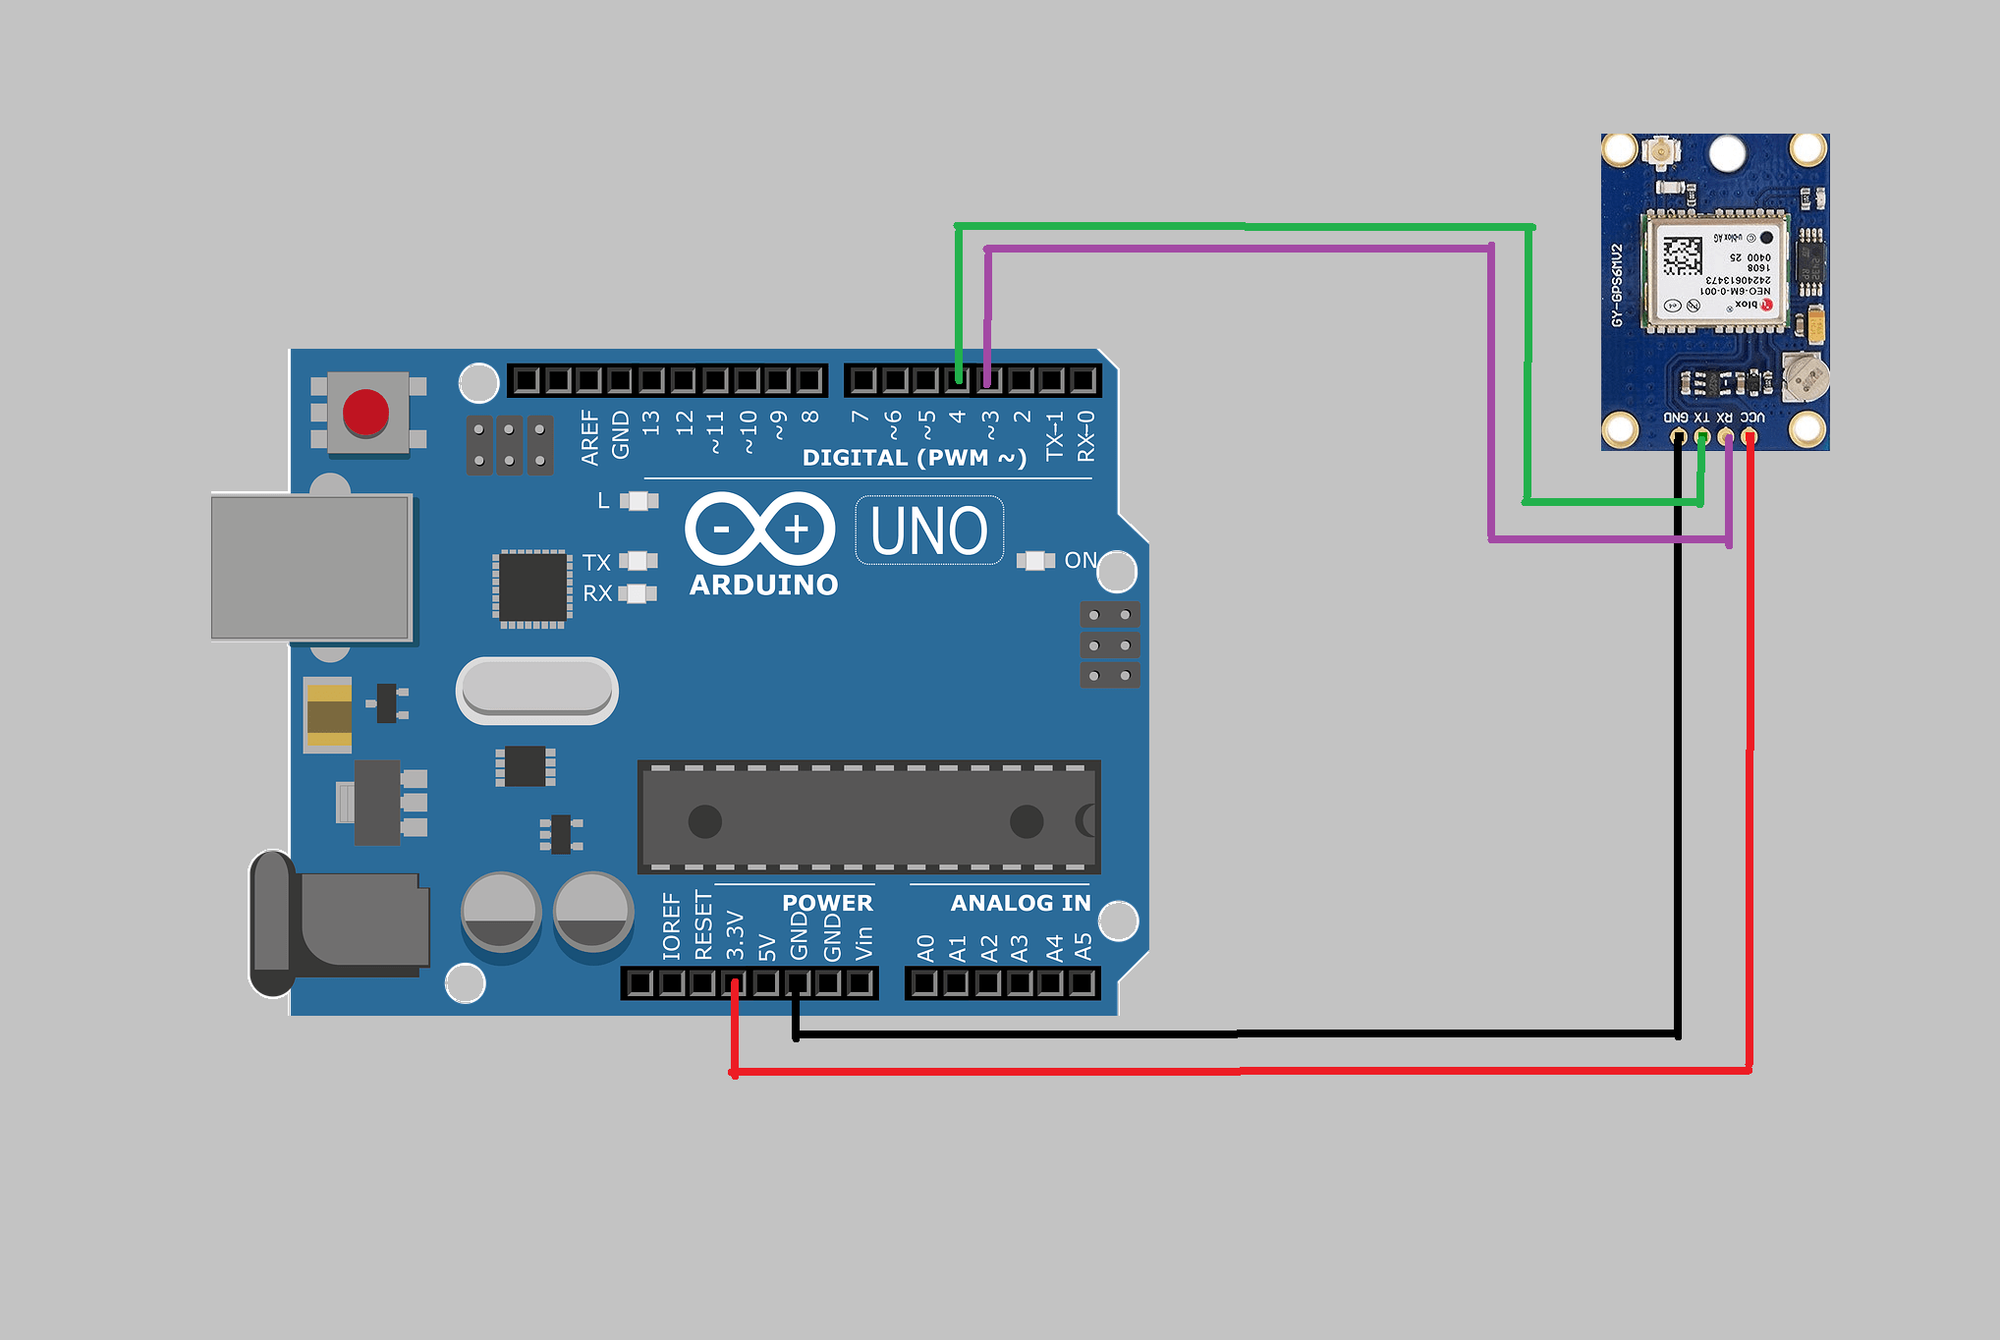
About NEO-6M GPS module Pinout The NEO-6M GPS module includes 4 pins: VCC pin: needs to be connected to VCC (5V) GND pin: needs to be connected to GND (0V) TX pin: is used for serial communication, needs to be connect to Serial (or SoftwareSerial) RX pin on Arduino.
Makerobot Education GPS Module Interfacing With Arduino UNO
GPS Interfacing with Computer Using Arduino GPS is a very useful device which is used in many electronics projects and applications like vehicle tracking system, GPS Clock , Accident Detection Alert System, traffic navigation and surveillance system etc. But question is how to use the GPS and read the data from GPS?
How to Interface Gps module with Arduino ENGINEER THIIS
Working. In this project we aims to find out the coordinates of a place using GPS. Here we are using GPS module and Arduino Uno. GPS module finds the location (latitude, longitude) from the signals received from the satellite. Arduino reads information from the GPS module via serial communication (UART).
Arduino GPS Display Location on I2C 2x16 LCD with Visuino Hackster.io
The Ultimate Guide to Building an Arduino GPS Map Navigation System September 6, 2023 Ralph The global positioning system (GPS) that people use every day for navigation in cars or via smartphones, may actually provide an easy DIY application using the Arduino microcontroller.
GPS Tracking System with Arduino Uno and Digilent PmodGPS Arduino
NEO-6M GPS module with Arduino. The neo6m GPS module typically has four main pins -VCC, GND, TX and RX. The below image shows the neo6mv2 GPS module pinout. VCC: Connects to a 5V power supply. GND: Ground connection. TX: Transmit pin (outputs data), connects to the RX pin of the Arduino or another device (receiver).

Dan White ArduinoPowered GPS Speedometer
To follow this tutorial, you can use any GPS module that supports NMEA and UBlox protocol via serial communication similar to this GPS module. I used the NEO-6M GPS module in this tutorial. You can use an Arduino as a serial-to-usb converter just to check if your GPS receiver is working. This tutorial features the NEO-6M GPS module.
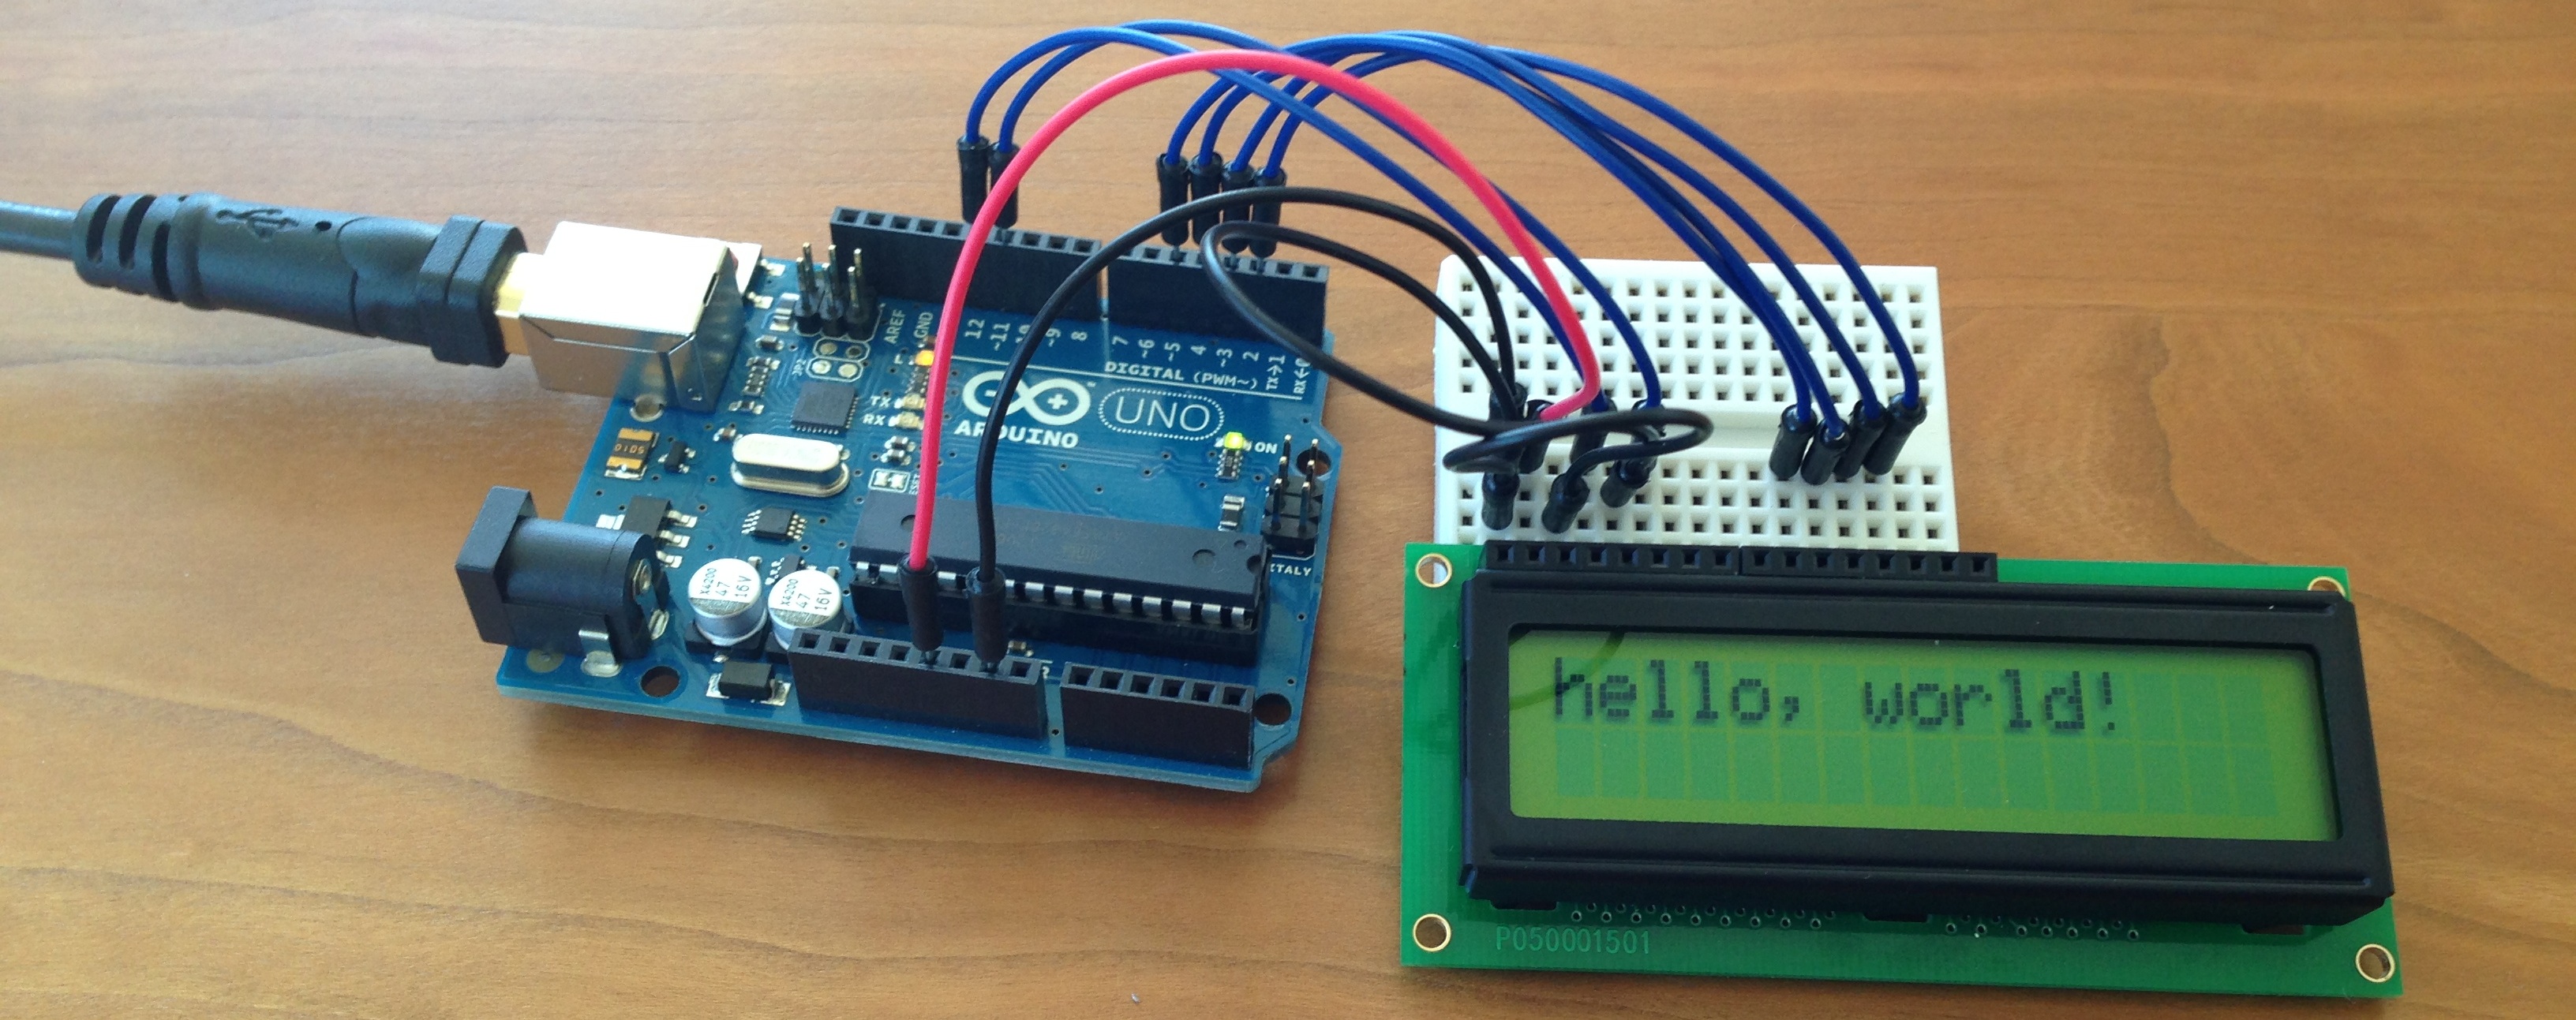
Arduino showing information from a GPS on a LCD
Interfaced GPS receiver module with Arduino UNO and display the Time, Latitude, Longitude, and Altitude info on the Serial window. Arduino read the data serially from GPS receiver using USART communication with 9600 Baud rate.

Guide to NEO6M GPS Module Arduino Random Nerd Tutorials
#include
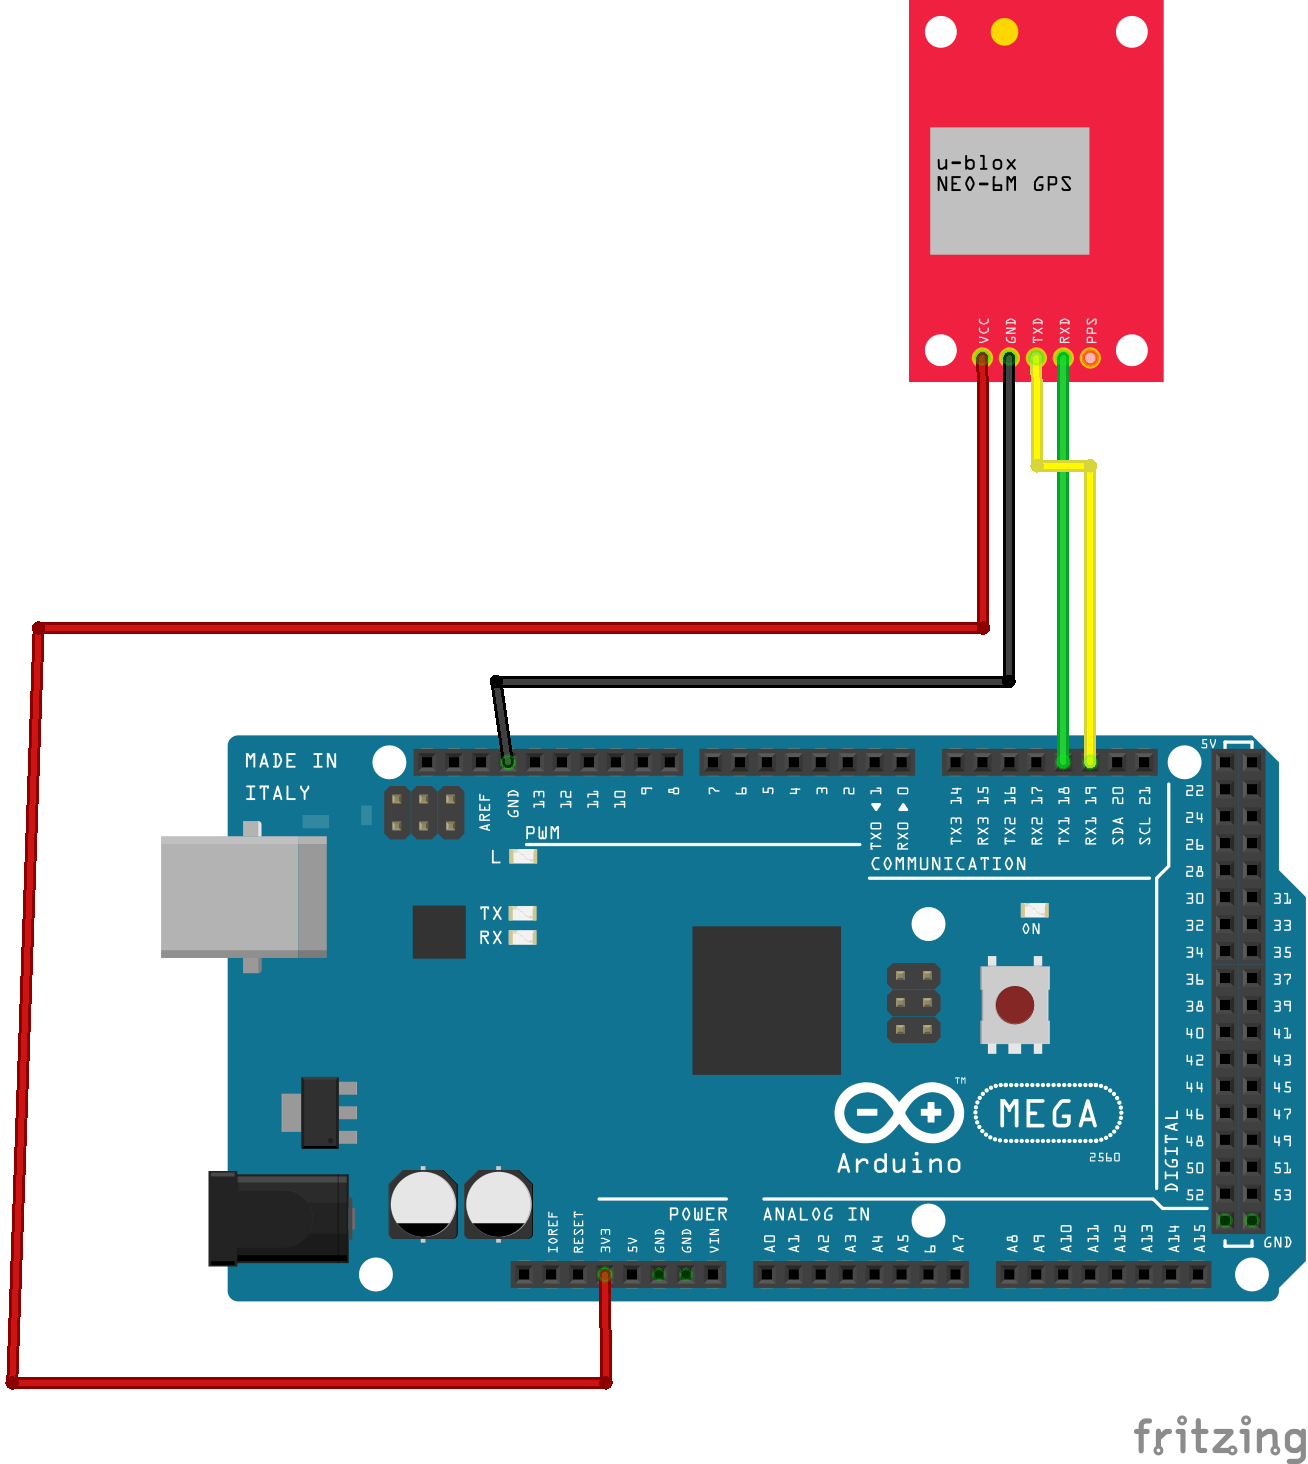
How to Interface Arduino Mega with NEO6M GPS Module Hackster.io
Step 4: Arduino Mega. Arduino is an open-source electronics platform based on easy-to-use hardware and software. Arduino boards are able to read inputs - light on a sensor, a finger on a button, or a Twitter message - and turn it into an output - activating a motor, turning on an LED, publishing something online.

One day Arduino projects Arduino project that current GPS information
This tutorial instructs you how to use Arduino Nano with a NEO-6M GPS module. In detail, we will learn: How to connect Arduino Nano to a NEO-6M GPS module How to program Arduino Nano to read GPS coordinates (longitude, latitude, and altitude) from a NEO-6M GPS module
LESSON 22 Build an Arduino GPS Tracker Technology Tutorials
Interface NEO-6M GPS Module with Arduino In this tutorial, we will learn about NEO-6M GPS module and how to interface it with Arduino to obtain GPS parameters such as latitude, longitude, altitude date, time, speed, satellites, etc.
